
Cooking time
- Preparation time
- 30 mins
- Difficulty
- easy
- Serves
- 2 people
- Meal course
- Pickles
- Posted by
- Posted on
- December 26, 2023
Ingredients
- 2 cup
- water
- 1 Ts
- coriander seeds
- 1 Ts
- mustard seeds
- 1 Ts
- whole black peppercorns
- 1 tablespoon
- sea salt
- 2 cloves
- Garlic
- 2 cup
- mixed vegetables
- 1/2 for garnish
- fresh dill
- 1/2 for garnish
- red pepper flakes
Introduction
Creating your own pickles and fermented vegetables at home is a journey of flavor, preservation, and gut-friendly probiotics. In this comprehensive guide, we will explore the world of DIY pickles and fermented veggies, covering techniques, benefits, and delicious recipes to elevate your culinary skills.
Facts about DIY Pickles and Fermented Vegetables

Before we immerse ourselves in the art of pickling and fermentation, let’s discover some fascinating facts about these traditional food preservation methods:
- Historical Roots: Pickling and fermentation have been used for centuries to preserve seasonal vegetables and enhance their flavors.
- Probiotic Power: Fermented vegetables are rich in probiotics, which promote gut health and digestion.
- Endless Variations: You can pickle and ferment a wide range of vegetables, creating unique flavors with various spices and seasonings.
Nutrients in Fermented Vegetables (Per 1 Serving)
Let’s take a look at the nutritional content of a typical serving of fermented vegetables:
| Nutrient | Amount per Serving |
|---|---|
| Calories | 25 |
| Total Fat | 0g |
| Sodium | 570mg |
| Total Carbohydrate | 5g |
| Dietary Fiber | 2g |
| Protein | 2g |
All About DIY Pickles and Fermented Vegetables

Now, let’s delve into the art of making your own pickles and fermented vegetables.
Ingredients
To start your pickling and fermentation journey, you’ll need the following basic ingredients:
- Vegetables: Choose fresh, high-quality vegetables like cucumbers, cabbage, carrots, or bell peppers.
- Salt: Use non-iodized salt, preferably sea salt or kosher salt.
- Water: Filtered water is best for brine preparation.
- Spices and Seasonings: Customize your flavors with spices like garlic, dill, peppercorns, and chili flakes.
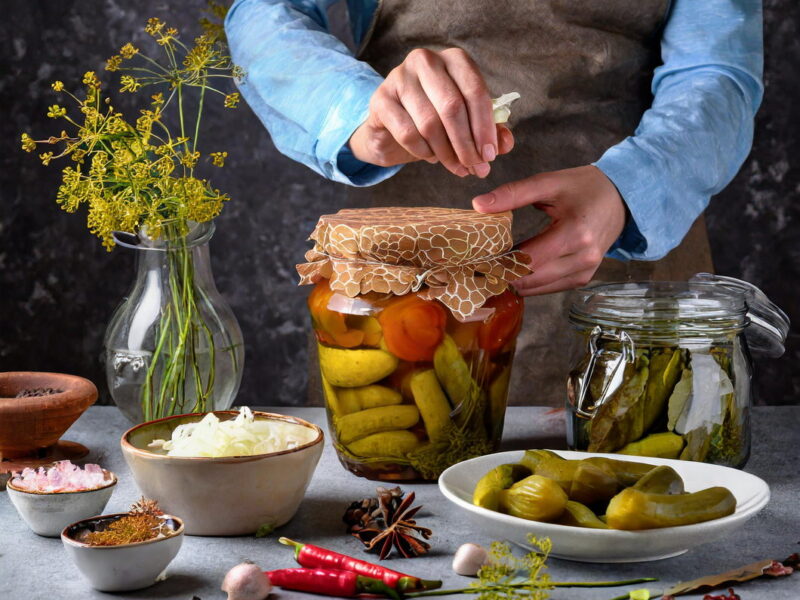
Instructions
- Preparation: Clean and chop your vegetables into the desired shape. For pickles, cucumbers are often sliced, while for fermented vegetables, cabbage is commonly shredded.
- Brine Preparation: Dissolve salt in water to create a brine solution. The ratio varies depending on the recipe but typically ranges from 1-3 tablespoons of salt per quart of water.
- Fermentation: Submerge the vegetables in the brine, ensuring they are fully covered. Use weights or fermentation tools to keep them submerged. Cover with a lid or cloth to allow gas to escape.
- Fermentation Time: The duration of fermentation varies by recipe but can range from a few days to several weeks. Taste along the way to achieve your desired level of sourness.
- Storage: Once fermentation is complete, transfer your pickles or fermented vegetables to jars and store them in the refrigerator to slow down the fermentation process.
Recipes and Variations
Experiment with different spices, herbs, and vegetable combinations to create your signature pickles and fermented treats. Common variations include sauerkraut, kimchi, and spicy dill pickles.
Conclusion for DIY Pickles and Fermented Vegetables
Mastering the art of DIY pickles and fermented vegetables opens up a world of culinary possibilities. Beyond the delightful flavors, these homemade creations offer health benefits through probiotics, making them a valuable addition to your kitchen.
FAQ – DIY Pickles and Fermented Vegetables

Q1: Are homemade pickles and fermented vegetables safe to eat?
A1: When prepared and stored correctly, homemade pickles and fermented vegetables are safe to eat. Follow recipes and guidelines to ensure proper fermentation and storage conditions.
Q2: How long can homemade pickles and fermented vegetables be stored?
A2: Properly stored homemade pickles and fermented vegetables can last for several months in the refrigerator. The flavor may continue to develop over time.
Q3: Can I use different vegetables for pickling and fermentation?
A3: Yes, you can pickle and ferment a wide range of vegetables, including cucumbers, cabbage, carrots, radishes, and more. Experiment to find your favorite combinations.
Please follow us on linkedin. You can learn all best canadian food recipes you can check our Culinary 1TouchFood Youtube and Telegram 1TouchFood page. Don’t forget Fighting Obesity Magazine and Radio Cooking.
Master the Art of DIY Pickles and Fermented Vegetables: Flavorful

Dive into the world of DIY Pickles and Fermented Vegetables. Learn the techniques, benefits, delicious recipes to enhance your culinary skills.
Type: pickles
Cuisine: american
Keywords: DIY Pickles and Fermented Vegetables
Recipe Yield: 2
Calories: 30
Preparation Time: PT0H30M
Cooking Time: PT0H00M
Total Time: PT0H30M
Recipe Ingredients:
- 2 cup water
- 1 Tea Spoon coriander seeds
- 1 Tea Spoon mustard seeds
- 1 Tea Spoon whole black peppercorns
- 1 tablespoon sea salt
- 2 cloves Garlic
- 2 cup mixed vegetables
- 1/2 for garnish fresh dill
- 1/2 for garnish red pepper flakes
Recipe Instructions: Prepare the Vegetables: Wash and chop your chosen vegetables into bite-sized pieces. Remember, the more variety, the better! Create the Brine: In a pot, combine 2 cups of water with the sea salt. Stir until the salt dissolves. This is your brine. Pack the Jars: In sterilized jars, layer the chopped vegetables, minced garlic, black peppercorns, mustard seeds, and coriander seeds. If you love dill or a bit of heat, now is the time to add it. Pour in the Brine: Carefully pour the brine over the vegetables, ensuring they are fully submerged. Leave some space at the top of the jar. Fermentation Magic: Seal the jars and place them in a cool, dark place. Let the natural fermentation process work its magic. Check after 3 days and continue until you achieve the desired tanginess (usually 7-10 days). Taste Test: Once fermented, refrigerate the jars. The pickles and veggies are ready to eat! Share with friends or keep them all to yourself.
5
Instructions
- Prepare the Vegetables: Wash and chop your chosen vegetables into bite-sized pieces. Remember, the more variety, the better!
- Create the Brine: In a pot, combine 2 cups of water with the sea salt. Stir until the salt dissolves. This is your brine.
- Pack the Jars: In sterilized jars, layer the chopped vegetables, minced garlic, black peppercorns, mustard seeds, and coriander seeds. If you love dill or a bit of heat, now is the time to add it.
- Pour in the Brine: Carefully pour the brine over the vegetables, ensuring they are fully submerged. Leave some space at the top of the jar.
- Fermentation Magic: Seal the jars and place them in a cool, dark place. Let the natural fermentation process work its magic. Check after 3 days and continue until you achieve the desired tanginess (usually 7-10 days).
- Taste Test: Once fermented, refrigerate the jars. The pickles and veggies are ready to eat! Share with friends or keep them all to yourself.
No comments yet, be the first to leave one!