Here is Canning Jam Method. There’s something truly special about homemade jam. The vibrant colors, the luscious texture, and the burst of flavor in every spoonful make it a beloved addition to breakfast spreads, desserts, and even savory dishes. If you’ve ever wanted to capture the essence of ripe, juicy fruits in a jar, then it’s time to explore the world of canning jam. In this article, we will guide you through the process of canning jam, from selecting the perfect fruit to sealing the jars for long-lasting freshness.
The Joy of Homemade Jam
There’s no denying the satisfaction that comes from spreading a dollop of homemade jam on a warm slice of toast or using it to elevate a plain yogurt or cheese plate. When you make your own jam, you have full control over the ingredients, ensuring that it’s free from artificial additives and preservatives. Plus, it’s a delightful way to capture the flavors of seasonal fruits and enjoy them throughout the year.
Getting Started with Canning Jam

Before diving into the canning process, let’s gather everything you need to create delicious jars of homemade jam. You can learn Troubleshooting Canning.
Equipment and Supplies
To start canning jam, you will need:
- Canning jars with lids and bands
- A large stockpot or canning kettle
- Jar lifter or tongs
- Canning funnel
- Bubble remover tool
- Wooden spoon or spatula
- Measuring cups and spoons
- Pectin (if necessary)
- Sugar or alternative sweeteners
- Lemon juice (for acidity)
Make sure all your equipment and jars are clean and in good condition to ensure a successful canning process. You can Learn Benefits of Canning.
Choosing the Right Fruit
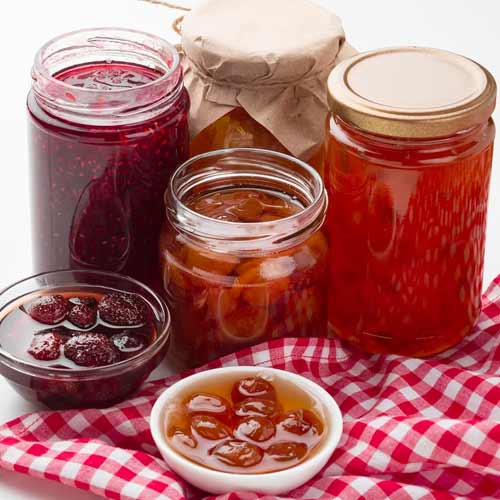
Selecting the right fruit is crucial for achieving delicious jam. Choose ripe, high-quality fruits that are in season for the best flavor. Popular choices for jam include strawberries, raspberries, blueberries, peaches, and apricots. Experiment with different fruits or even mix them together for unique flavor combinations. You can learn Storing Canned Food.
Essential Ingredients
Aside from the fruit, you’ll need sugar or alternative sweeteners, such as honey or maple syrup, to sweeten the jam and help with preservation. Lemon juice is often added to enhance acidity, which aids in the gelling process and extends the shelf life of the jam. Additionally, some recipes may require pectin, a natural thickening agent, to achieve the desired consistency.
Step-by-Step Canning Jam Process

Now that you have everything prepared, let’s dive into the step-by-step process of canning jam. You can learn Steam Canning.
Preparing the Fruit
Wash the fruit thoroughly and remove any stems, pits, or unwanted parts. For berries, gently crush them to release their juices. Cut larger fruits into small, uniform pieces for even cooking.
Cooking the Jam
In a large, non-reactive pot, combine the prepared fruit, sugar or sweetener, and lemon juice. Cook the mixture over medium heat, stirring frequently to prevent sticking or burning. As the mixture heats, the fruit will soften and release its natural juices. Simmer the jam until it reaches the desired consistency, usually around 20-30 minutes.
Filling and Sealing the Jars
While the jam is still hot, carefully ladle it into the sterilized jars, leaving a recommended head space. Use a bubble remover tool or a wooden utensil to remove any air bubbles trapped in the jam. Wipe the jar rims clean, ensuring a proper seal. Place the lids on the jars and screw the bands until fingertip tight. You can learn Canning Safety.
Processing the Jars
Place the filled and sealed jars in a canning pot or stockpot with boiling water, ensuring they are fully submerged. Process the jars for the recommended time, typically 10-15 minutes depending on your altitude and recipe. Once processed, carefully remove the jars and let them cool on a towel-lined countertop. As they cool, you may hear the satisfying “pop” sound, indicating a successful seal. You can learn Types of Canning.
Safety Tips for Canning Jam

When it comes to canning, safety should always be a top priority. Follow these essential tips to ensure safe preservation of your homemade jam:
- Use tested and reliable recipes from reputable sources.
- Maintain proper hygiene and cleanliness throughout the canning process.
- Use fresh ingredients and check for signs of spoilage or mold.
- Adjust processing times and temperatures based on your altitude.
- Store the sealed jars in a cool, dark place away from direct sunlight.
Flavorful Variations and Recipe Ideas
While classic fruit jams are delightful (Canning jam), don’t be afraid to get creative and experiment with flavors. Consider adding herbs like basil or lavender for an aromatic twist, or incorporate spices like cinnamon or ginger for a warm and cozy touch. You can even combine different fruits to create your own signature jam blends. Let your imagination guide you and enjoy the process of exploring new flavors.
Storing and Enjoying Your Homemade Jam
Once your jam has cooled and the jars have properly sealed, store them in a cool, dark place such as a pantry or cellar. Homemade jam can typically last up to a year when stored properly. Remember to label your jars with the date of canning for easy tracking. You can learn Home Canning Chicken.
To savor your homemade jam (Canning jam), spread it on toast, muffins, or pancakes, or use it as a filling for pastries and cakes. Get creative and incorporate it into savory dishes like glazes for roasted meats or as a flavor enhancer in sauces and dressings. The possibilities are endless, so enjoy your sweet creations throughout the year.
Conclusion
Canning jam is a rewarding culinary adventure that allows you to preserve the flavors of seasonal fruits and enjoy them long after the harvest is over. With the right equipment, fresh ingredients, and a little patience, you can create jars of homemade jam that will brighten your breakfast table and bring joy to your taste buds. So, gather your favorite fruits, roll up your sleeves, and embark on a delightful journey of canning jam. You can learn Canning Hacks.
FAQs
- How long does homemade jam last?
- When properly stored in a cool, dark place, homemade jam can last up to a year. Be sure to check for any signs of spoilage before consuming.
- Can I use frozen fruit for making jam?
- Yes, frozen fruit can be used for making jam. Thaw the fruit before cooking and adjust the cooking time accordingly.
- What is pectin, and do I need it for making jam?
- Pectin is a natural substance found in fruits that helps thicken the jam. Some fruits naturally contain enough pectin, while others may require added pectin for proper gelling. Refer to your recipe for guidance.
- Can I reduce the amount of sugar in jam recipes?
- Yes, you can adjust the amount of sugar or use alternative sweeteners according to your preference. Keep in mind that sugar plays a role in preservation, texture, and flavor, so make sure to follow a tested recipe or use pectin designed for low-sugar or no-sugar jams.
- How do I know if my jars are properly sealed?
- After the jars have cooled, check the seals by pressing down on the center of the lid. If it doesn’t flex or make a popping sound, the jar is properly sealed. Alternatively, you can remove the band and gently lift the jar by the lid to see if it holds. Any unsealed jars should be refrigerated and consumed promptly.
We proudly present: 1TouchFood, a website specifically designed for online cooking education. Our platform offers a diverse range of culinary tutorials, aimed at teaching aspiring chefs and cooking enthusiasts the art of cooking from the comfort of their own homes. Whether you’re a beginner or an experienced cook looking to expand your culinary repertoire, 1TouchFood provides step-by-step video lessons, interactive recipes, and expert tips to enhance your cooking skills.
Our dedicated team of professional chefs and culinary experts have meticulously crafted each lesson to ensure a seamless and immersive learning experience. Join us on 1TouchFood and unlock your potential in the kitchen as you embark on a culinary journey filled with flavors, techniques, and newfound inspiration. You can learn History of Canning.
Please follow us on linkedin. You can learn all best canadian food recipes you can check our Culinary 1TouchFood Youtube and Telegram 1TouchFood page. Don’t forget Fighting Obesity Magazine and Radio Cooking.

